Certificates, Identifiers, and Profiles Oh My

A quick and dirty guide to Apple’s code signing.
Certificates certify the authenticity of a developer’s device to build apps. This is done in the Apple developer portal. Creating a new certificate involves creating a Certificate Signing Request (CSR) file from your Mac. Once the CSR is created, the certificate can be generated.
Identifiers are unique identifiers for your app. They are unique and tied to the App Store ID. The typical format follows com.
Devices are just a list of Apple devices that can be deployed to for testing. When creating a test build locally, the devices will need to be added here and to the provisioning profile in which they will be tested.
Provisioning Profiles are where the certificates (what we can build), identifiers (what app we are building) and devices (what we can deploy to) are matched up to each other. This along with the certificate installed on the developer’s Mac is what allows us to export a P12 file.
Creating an Identifier
- Go to the Identifiers and select the plus icon
- Select App IDs and click continue
- Select App and click continue
- Enter a short description and bundle ID (com.
. - Select the appropriate capabilities and services the app will provide and click continue
- Verify everything entered and click register
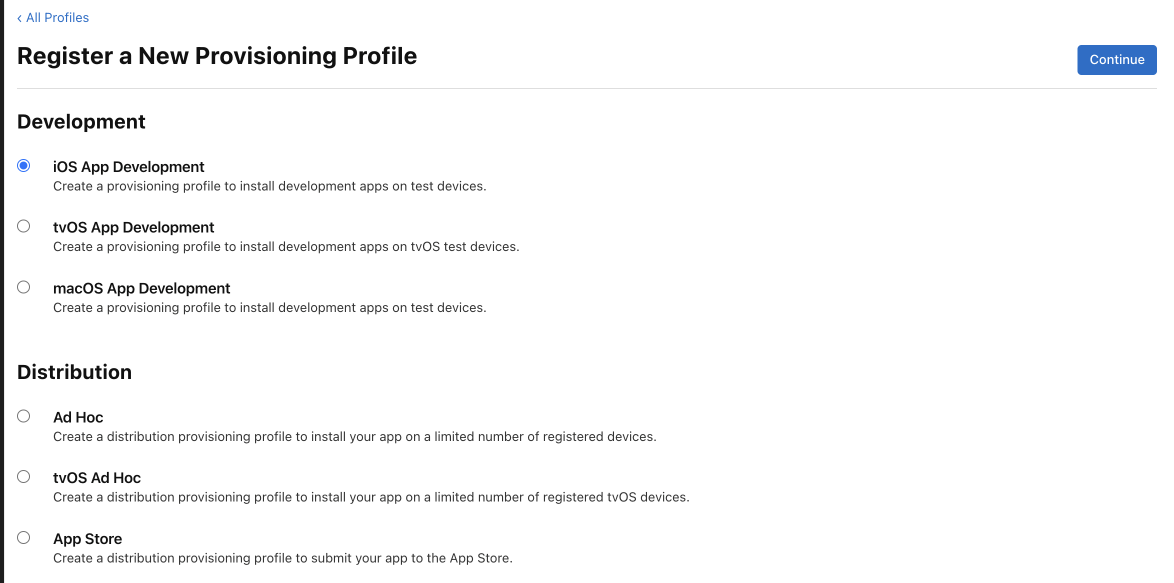
Creating a Provisioning Profile
-
Go to the Profiles and select the plus icon
-
Select iOS App Development for development or App Store for distribution to the App Store
-
For distribution, just click continue and select the certificate. For development continue.
-
Click continue and select the appropriate App ID that was created in Identifiers
-
Click continue and select the certificates that are going to use this provisioning profile
-
Click continue and select the devices to include in the provisioning profile to deploy the app to
-
Click continue and name the provisioning profile
-
Click generate, then download the provisioning profile and install it locally via Xcode
Creating a Certificate
-
Go to certificates and select the plus icon
-
Select iOS App Development for iOS development or iOS Distribution for distributing iOS applications to the App Store

-
Create a CSR as instructed below, then upload it as instructed on the next screen
-
Continue and the certificate has been generated. Once generated, download and install on your Mac.
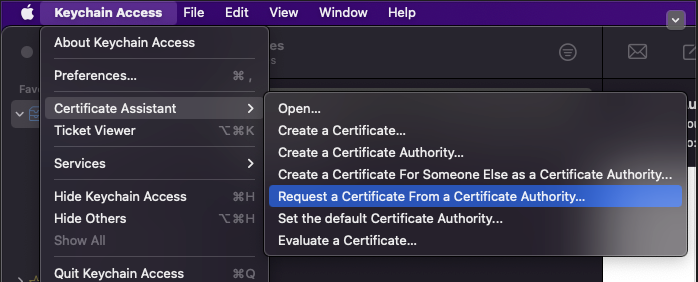
Creating a CSR file
-
Opening Keychain Access on the Mac
-
Requesting a CSR from a certificate authority
-
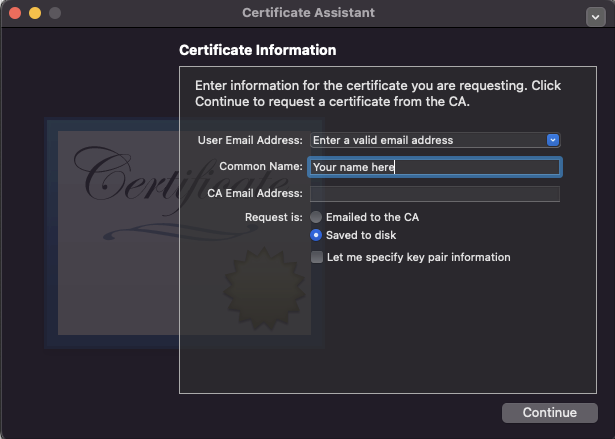
Fill in the details on the next screen
-
Click continue and save the CSR where it is easily accessible
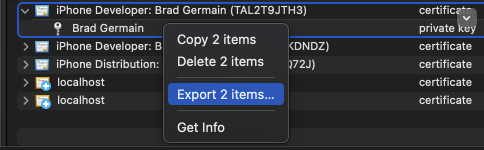
How to export P12
Exporting a P12 file can be necessary for automated builds or for sharing certificates to other developers
Once a certificate has been created with the CSR from your device and the provisioning profile, which has your certificate selected, has been downloaded and installed on the device you should see an arrow next to the certificate. Once you click the arrow you’ll see the private key that was generated from your device. Select both the private key and the certificate and two-finger click export to export as a P12 file.